Minimal Debian Wheezy+Plex on ODROID-C1
Minimal Debian Wheezy+Plex on ODROID-C1
I celebrate the 600th post today, so I took the opportunity to make a tutorial: I have proposed creating a Plex server to share home videos that I have through my network. Obviously I will use the C1 because the Gigabyte Ethernet card, but is perfectly valid for Raspberry Pi.
[ FIRST STEPS ]
We will use for our C1 the image of minimal Debian Wheezy that you can find in the official forums. If you have the Pi, any Debian distro is good for you.
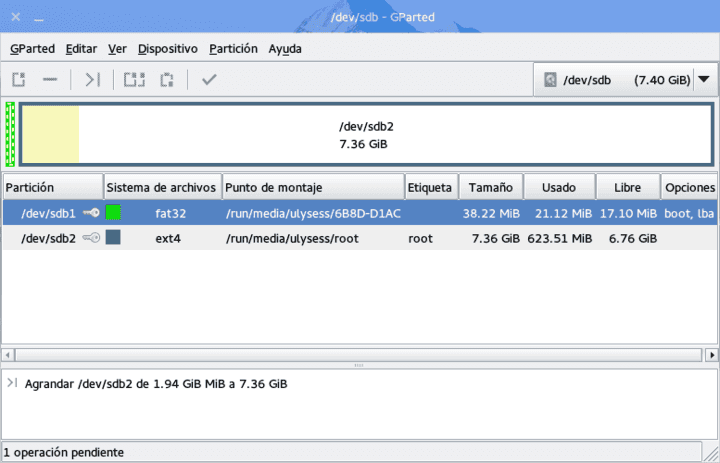
To resize the partition on SD, we will have to use Gparted on a PC running Linux.
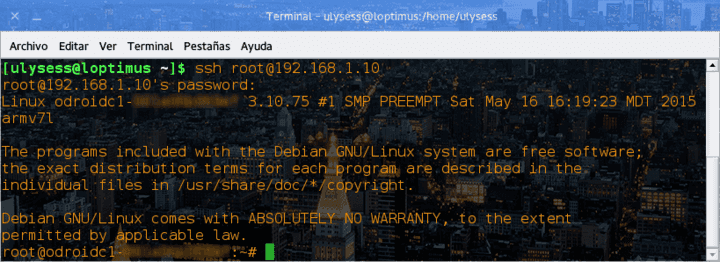
Insert the SD in your board and access via SSH to the operating system. The root password is odroid.
[Installing PLEX MEDIA SERVER]
In my case, I followed a tutorial on HTPCGuides where everything is explained in a way very clear. Basically you have to run this steps:
apt-get update
apt-get install libexpat1 ntfs-3g -y
apt-get install apt-transport-https -y --force-yes
wget -O - https://dev2day.de/pms/dev2day-pms.gpg.key | apt-key add -
echo "deb https://dev2day.de/pms/ wheezy main" | tee /etc/apt/sources.list.d/pms.list
apt-get update
apt-get install plexmediaserver -y
Warning, I changed the repo article from jessie to wheezy.
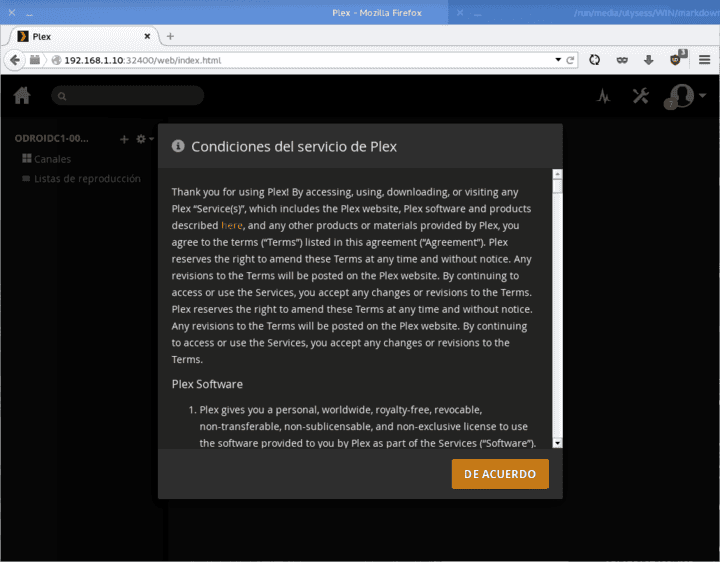
Done!. Now access from a PC to the following address http://ip-ODROID:32400/Web and you will see a control panel like this:
If you need to restart the daemon: service plexmediaserver restart
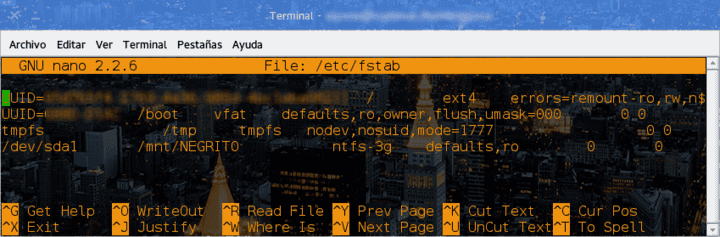
If you use another operating system, you must mount the flash drive you want manually or install the package usbmount. With hard drives, fdisk -l and add your partition to the file /etc/fstab.
Now click on the left menu option + to add content and... Enjoy!
[ Fix: Plex Media Server 'is not powerful enough' error ]
Come back to the server through SSH and run the next commands:
cd /var/lib/plexmediaserver/Library/Application\ Support/Plex\ Media\ Server/Plug-ins/WebClient.bundle/Contents/Resources/js/

sed -e 's/validateTranscoder:function(e,t){if(!e.canDirectPlay)/validateTranscoder:function(e,t){return false;if(!e.canDirectPlay)/ig' ./plex.js
[ Other tweaks ]
Although you can play multimedia content now, it is important to set some parameters to provide an extra security layer:
Create an account on Plex website and add your user to Settings > Server > General. This allow you for example to log in remotely.
Change the Plex computer name: It is done from Settings > Server > General > family name
Rename the host: For security reasons with the following command:
echo "new_host_name" > /etc/hostname # Where new_host_name is the new name of your host
Also check the file /etc/hosts to change the old name for the new.
Would not it be interesting to have a read-only operating system to avoid corrupting the SD and cutting power shutdown?. You can use another distro that comes in the forums or follow the manual that I made and you can read here.
Check out also the advanced settings.
[ Download the client ]
We have the server ready, but now, according to the device where we go to play the content, we have to install a client. Here are some free except for the iOS version:
Link: Android (Google Play) | VLC
Link: Plex for iOS (App Store: $4,99) | VLC
Link: Windows 8
More: Other platforms
[ Backup ]
Anything can happen, especially SD corruptions, and create the database can take hours, even days. It is best to back up the folder that is hosted on /var/lib/plexmediaserver/Library/Application Support/Plex Media Server. It is as simple as running where you want (creating an alias, a file or scheduled task) the next:
tar rvf /root/ibackup_$(date +"%d%m%Y").tar /var/lib/plexmediaserver/Library/Application\ Support/Plex\ Media\ Server/
[ Ending words ]
The truth is that it was a good idea to rely on this media server and regret not having used it before. The ease with which you set up everything and how well it performs in the network, make it the ideal partner for this kind of boards. I hope you liked this guide and now you can enjoy your media content.