Sharing the internet connection from macOS to Raspberry Pi (Internet Sharing)
Sharing the internet connection from macOS to Raspberry Pi (Internet Sharing)
I work in a basement where the coverage is not very good and I only have one Ethernet cable which is for my Macbook Pro. How do I connect the Raspi or my other SBC to the outside world from there?. I use a function that has macOS to share internet. It seems the easiest coming from Apple, but there is a step that took me a while to solve. In this post I'll show you how to configure it. Don't lose detail.
[ macOS ]
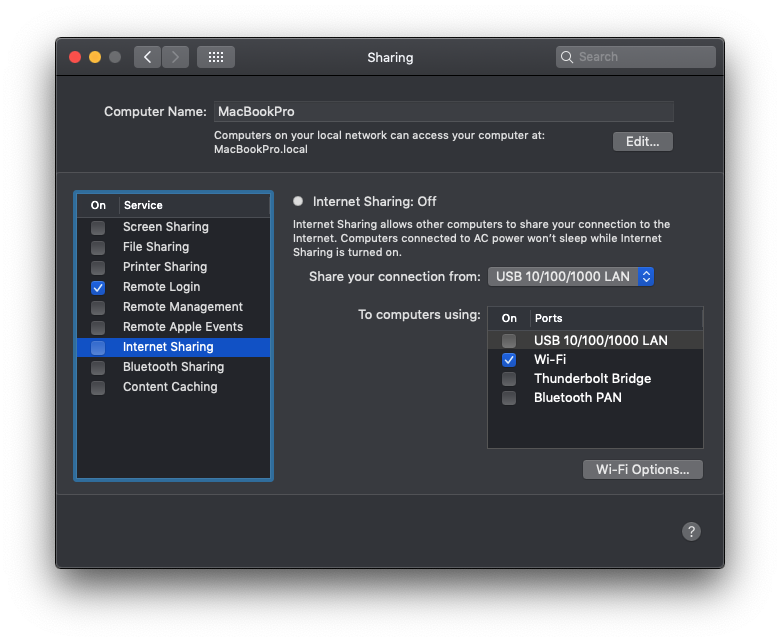
First you need to click on the Apple icon in the upper left and choose System Preference > Sharing. We chose Internet Sharing but don't click on the checkbox yet. We will do it later.
Let's put in Computer Name something simple: MacBookPro in my case. We do this because Raspbian doesn't like names with apostrophes (like Jose's Macbook, for example). Now in Share your connection from, we choose the Ethernet adapter we have and in To computers using: Wi-Fi. We pressed Wi-Fi Options and chose a simple SSID name (I chose mac1), and as security system WPA2 Personal (the only one available). Choose a password name and repeat it twice. Now you can click on the checkbox of Internet Sharing and Start.
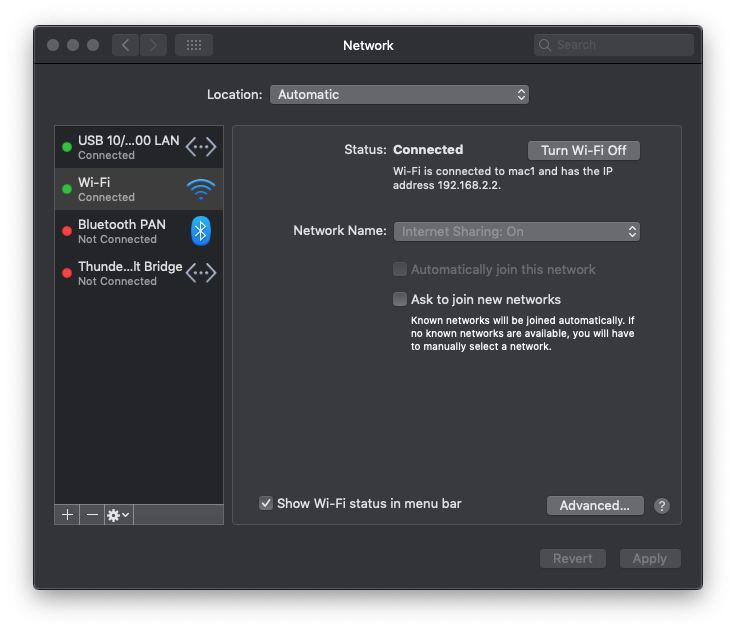
Now we go to System Preference > Network, choose the Wi-Fi adapter and press Advanced...
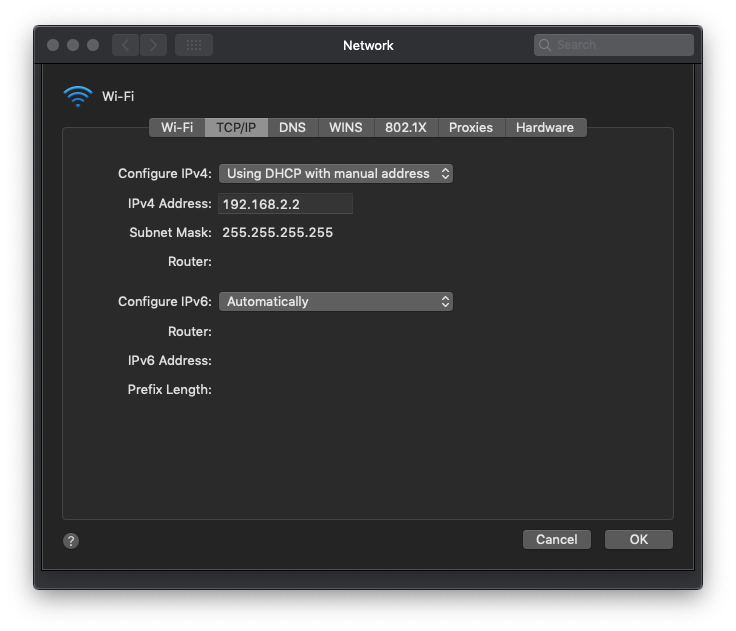
- In the TCP/IP tab, choose Using DHCP with manual address and set the ip that was already set. If the subnet mask is not recognized, choose Manually and put it together with the IP of your router (usually 192.168.0.1).
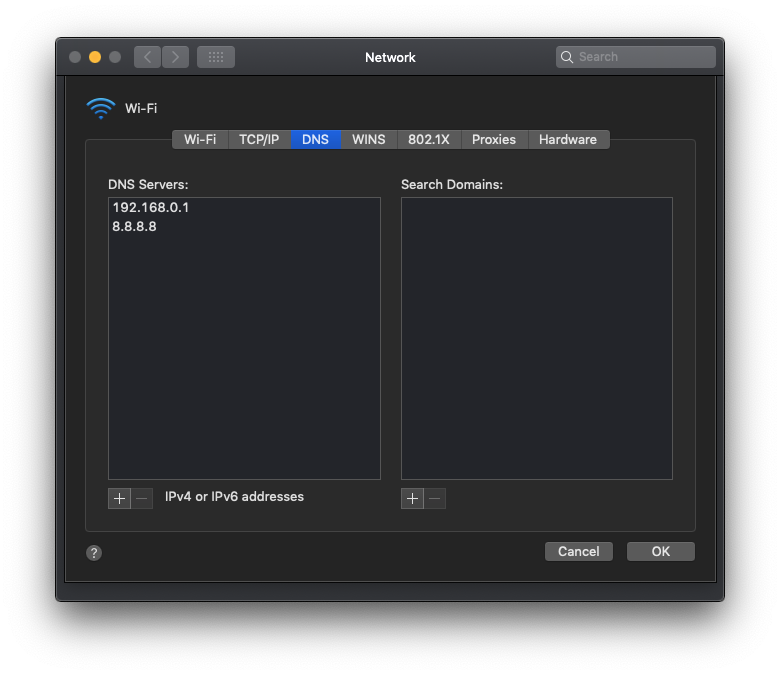
- In the DNS tab, I usually write the router (192.168.0.1) and some alternative IP like 8.8.8.8 (Google) or 1.1.1.1 (Cloudflare)..
Press OK and Apply. Notice the message in Status with IP and write it down. In my case, 192.168.2.2.
[ Raspberry Pi ]
I used Raspbian Buster in my tests, but you can use any other distro.
We connect to the network through the symbol next to the clock and we'll see the SSID that we configured on your Mac previously. We could also have configured it through the file /etc/wpa_supplicant/wpa_supplicant.conf. You can have a look at it if you want. In my case it's something like this:
ctrl_interface=DIR=/var/run/wpa_supplicant GROUP=netdev
update_config=1
country=ES

network={
	ssid="mac1"
	psk="mypskIsAwesome"
}
Now we need to take the last step to make the "magic" work. It's about configuring a static IP in the /etc/dhcpcd.conf file. As IP, we will put the one assigned to us by the system. And now you need to set routers and domain_ name_ servers parameters. We will set the IP that we had configured in the WiFi adapter of Mac. So we have the following data for example:
IP Wi-Fi Mac: 192.168.2.2
IP Wi-Fi Raspberry: 192.168.2.3
Below in the file dhcpcd.conf we will put this data. So finally my file has the next configuration:
interface wlan0
static ip_address=192.168.2.3
static routers=192.168.2.2
static domain_name_servers=8.8.8.8
We restart the Raspberry and we should already have a shared internet connection from our macOS. Congrats!